Dowels are made on the steering seat on the ball head of the car, and the rollers are assembled to the steering seat through the dowels. The prior art is manual driving of the pins, and the position of the pins is inaccurate when driving the pins, the labor intensity is high, the efficiency is low, and the quality of the steering seat is also affected. Therefore, it is necessary to design an automatic pin-driving mechanism to drive the pins into the steering seat. .
The contact surface between the existing chassis and the main board is generally not a horizontal plane due to processing reasons, especially the main board is prone to warping deformation. It will increase, resulting in deformation of the motherboard and poor memory contact, affecting normal use.
Inspection method There are two types of screw surface inspection, one is the inspection before the screw is produced and not plated, and the other is the inspection after the screw is plated, that is to say, after the screw is hardened and the surface of the screw is treated. . After the screws are produced and before electroplating, we inspect the screws in various aspects such as size and tolerance. See if there are national standards or customer requirements. After the surface treatment of the screws, we will inspect the plated screws, mainly to check the color of the plating and whether there are any broken screws. In this way, when we deliver screw goods to customers, customers can successfully pass the customs when they receive the goods. Inspection of screws after treatment: 1. Appearance quality requirements The inspection of the appearance of screws is carried out from the aspects of appearance, electroplating layer and so on. Second, the inspection of the thickness of the screw coating 1. The measuring tool method uses a micrometer, a vernier caliper, a plug gauge, etc. 2. Magnetic method The magnetic method is used to measure the thickness of the coating layer, which is a non-destructive measurement of the non-magnetic coating layer on the magnetic substrate with a magnetic thickness gauge. 3. Microscopy Microscopy is called metallographic method, which is to magnify the etched fasteners on a metallographic microscope with a micrometer eyepiece to measure the thickness of the coating on the section. 4. Timing flow method The timing flow method uses a solution that can dissolve the coating to flow on the local surface of the coating, and calculates the thickness of the coating according to the time required for the local coating to dissolve. There are also coating drop method, anodic dissolution Coulomb method, etc. 3. Inspection of the adhesion strength of the screw coating There are many methods for evaluating the adhesion between the coating and the base metal, usually the following. 1. Friction polishing test; 2. File method test; 3. Scratch method; 4. Bending test; 5. Thermal shock test; 6. Extrusion method. 4. Inspection of corrosion resistance of screw coatings The corrosion resistance inspection methods of coatings include: atmospheric exposure test; neutral salt spray test (NSS test); acetate salt spray test (ASS test), copper accelerated acetate salt spray test (CASS) test); and corrosion paste corrosion test (CORR test) and solution spot corrosion test; immersion test, inter-dipping corrosion test, etc.
Cylindrical pins are widely used for positioning or connecting components on mechanical equipment, and the cylindrical pins are fixed in the pin holes by means of interference fit. Cylindrical pins are generally processed by a grinding machine and a punch former, but the above processing methods have complex operation procedures, high processing equipment and high processing costs.
For hexagonal nuts, the commonly used standards are: GB52, GB6170, GB6172 and DIN934. The main differences between them are: the thickness of GB6170 is thicker than that of GB52, GB6172 and DIN934, commonly known as thick nuts. The other is the difference between the opposite sides, the opposite sides of DIN934, GB6170 and GB6172 in the M8 nut series are 13MM smaller than the opposite side 14MM of GB52, and the opposite sides of M10 nuts, DIN934 and GB52 are 17MM. The opposite side of GB6170 and GB6172 should be 1MM larger, M12 nut, DIN934, GB52's opposite side is 19MM larger than GB6170 and GB6172's opposite side 18MM is 1MM larger. For M14 nuts, the opposite side of DIN934 and GB52 is 22MM, which is 1MM larger than the opposite side of GB6170 and GB6172, which is 21MM. The other is the M22 nut. The opposite side of DIN934 and GB52 is 32MM, which is 2MM smaller than the opposite side of GB6170 and GB6172, which is 34MM. (Besides the thickness of GB6170 and GB6172 are the same, the width of the opposite side is exactly the same) The rest of the specifications can be used in general without considering the thickness.
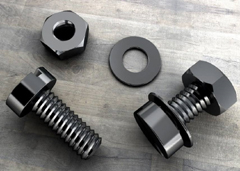
We have many years of experience in the production and sales of screws, nuts, flat washers, etc. The main products are: internal expansion screws, GB11 countersunk head screws, round head rivets, motherboard copper column nuts and other products, we can provide you with suitable fastening products piece solution.


 Service Hotline


