What is the tolerance range of precision screws?
What is the tolerance range of precision screws?
Service Hotline
+86760-8787 8587We have more than ten years of production experience in the screw industry. The main products are: stainless steel nuts, ANSI nuts, steel structure screws, blue race steel washers, hexagonal flange lock nuts, black plated 304 screws, flat cap copper nails, external Hexagon three combination screws and bolts, with pad nuts, concave end screws, GB882 pins, quenched direct pins, 201 elastic washers, anti-thread external hexagon screws, lock connection furniture nuts and other fasteners, due to different product materials and specifications , the price is also different, please contact us if necessary.


Rivets are a commonly used fixing structure, but because rivets need to be deformed by pressure during use, it is easy to cause structural changes inside the metal, which will shorten the service life.

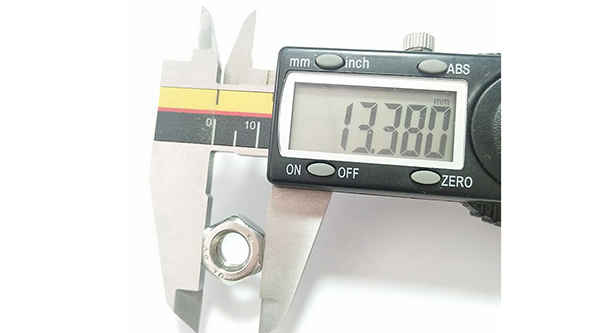
Inspection method There are two types of screw surface inspection, one is the inspection before the screw is produced and not plated, and the other is the inspection after the screw is plated, that is to say, after the screw is hardened and the surface of the screw is treated. . After the screws are produced and before electroplating, we inspect the screws in various aspects such as size and tolerance. See if there are national standards or customer requirements. After the surface treatment of the screws, we will inspect the plated screws, mainly to check the color of the plating and whether there are any broken screws. In this way, when we deliver screw goods to customers, customers can successfully pass the customs when they receive the goods. Inspection of screws after treatment: 1. Appearance quality requirements The inspection of the appearance of screws is carried out from the aspects of appearance, electroplating layer and so on. Second, the inspection of the thickness of the screw coating 1. The measuring tool method uses a micrometer, a vernier caliper, a plug gauge, etc. 2. Magnetic method The magnetic method is used to measure the thickness of the coating layer, which is a non-destructive measurement of the non-magnetic coating layer on the magnetic substrate with a magnetic thickness gauge. 3. Microscopy Microscopy is called metallographic method, which is to magnify the etched fasteners on a metallographic microscope with a micrometer eyepiece to measure the thickness of the coating on the section. 4. Timing flow method The timing flow method uses a solution that can dissolve the coating to flow on the local surface of the coating, and calculates the thickness of the coating according to the time required for the local coating to dissolve. There are also coating drop method, anodic dissolution Coulomb method, etc. 3. Inspection of the adhesion strength of the screw coating There are many methods for evaluating the adhesion between the coating and the base metal, usually the following. 1. Friction polishing test; 2. File method test; 3. Scratch method; 4. Bending test; 5. Thermal shock test; 6. Extrusion method. 4. Inspection of corrosion resistance of screw coatings The corrosion resistance inspection methods of coatings include: atmospheric exposure test; neutral salt spray test (NSS test); acetate salt spray test (ASS test), copper accelerated acetate salt spray test (CASS) test); and corrosion paste corrosion test (CORR test) and solution spot corrosion test; immersion test, inter-dipping corrosion test, etc.


Sprinkle the excess standard spring washer 7 on the positioning plate 12-1 on the spring washer positioning plate 2, and shake the spring washer positioning plate 2 by hand. After a short time, the spring washer 7 will be positioned and arranged on the upper positioning plate 12-1. In the upper spring washer hole 2-7, since the width of the opening groove 12-32 of the baffle plate 12-3 is smaller than the diameter of the spring washer hole 2-7, and the thickness of the upper positioning plate 12-1 is designed according to the thickness of the spring washer 7, Only one spring washer 7 can be accommodated in the spring washer hole 2-7 of each upper positioning plate 12-1, and the excess spring washer 7 is cleaned with a brush.

With the development of science and technology, the advancement of technology, the rapid change of automotive products, also put forward higher requirements for fastener products, and automotive fastener-related products, especially in the process of assembling auto parts, in order to effectively improve the bolts The fastening strength is mostly made of combined gaskets (flat gaskets, cone gaskets) and riveted nuts to meet the assembly requirements.

The above content is uploaded by Yueluo or the Internet. If there is any copyright issue, please contact [email protected].

What is the tolerance range of precision screws?

How to choose the right stainless steel screw manufacturer?

Why is there an R angle under the head of the hexagon head s...

We have more than ten years of production experience in the ...

We have more than ten years of experience in the production ...

We have more than ten years of experience in the production ...

We have more than ten years of experience in screw industry ...